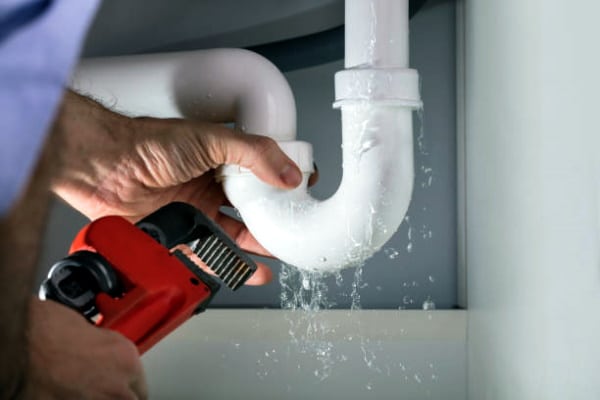
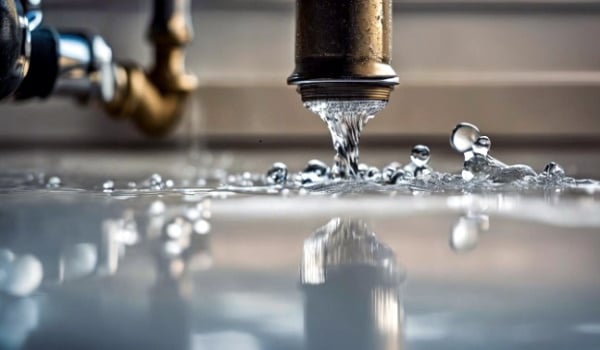
Frustrated at the constant dripping noises from your kitchen sink or the puddle under your bathroom vanity? Save yourself from an imminent plumbing fiasco and hefty bills with our simple guide to fixing leaky pipes.
In this blog post, you’ll be delving into the common causes of leaking pipes and exploring some easy DIY solutions that could spell the end of your watery woes. Whether you’re a first-time homeowner needing a quick fix before your plumber arrives or a seasoned handyman looking to add more tools to your arsenal, this must-read is just for you.
Identifying Your Pipe Leak
One of the first steps in fixing a leaking pipe is to accurately identify where the leak is occurring. This may seem like a simple task, but it can be challenging, especially if the leak is hidden or not easily visible. There are a few common signs that can help you pinpoint the location of the leak.
Imagine that you notice dampness or wet spots on your walls, ceilings, or floors. These could indicate a hidden pipe leak behind the surface. Water stains or discoloration on walls or ceilings are another telltale sign. If you notice a sudden increase in your water bill without any changes in usage, it’s worth investigating for potential leaks.
Additionally, you might observe dripping sounds or a constant running water noise even when all faucets are turned off. These auditory clues should not be ignored, as they can lead you to the source of the leak.
It’s important to note that not all leaks will be immediately visible. Some leaks may occur within the plumbing system itself, and detecting them might require further investigation.
How to Locate a Leak in Your Plumbing System
Locating a leak in your plumbing system can be challenging because pipes are often hidden behind walls, floors, or underground. However, there are methods you can employ to narrow it down and pinpoint the exact location of the leak.
One effective method is visual inspection. Examine all visible pipes in your home, paying close attention to joints, connections, and areas where pipes may be exposed. Look for any signs of moisture or dripping water along these pipes. Additionally, check for puddles or damp spots near fixtures such as sinks, toilets, or showers.
If the leak is not immediately visible, you can also use your senses. Feel the walls for any areas that are damper or colder than others. Listen for the sound of dripping water or hissing behind walls or in crawl spaces.
Another method is to turn off all water sources in your home and check your water meter. If the meter continues to move even when no water is being used, it suggests a leak within your plumbing system.
In more complex cases where the source of the leak cannot be readily determined, it may be necessary to enlist the help of professional plumbers who utilize specialized tools such as thermal imaging cameras or acoustic leak detectors to locate hidden leaks.
Remember, locating a pipe leak requires patience and attention to detail. The sooner you identify and address the issue, the better chance you have of preventing further damage and costly repairs.
The Root Causes of Pipe Leaks
Leaking pipes can be a frustrating and costly problem for homeowners. Understanding the root causes of these leaks is essential to resolving the issue effectively. One common cause is the age and deterioration of the pipes themselves. Over time, pipes can develop cracks, corrosion, or weakened joints, leading to leaks. Environmental factors such as extreme temperatures or shifting soil can also contribute to pipe damage. By identifying and addressing these underlying causes, homeowners can prevent future leaks and minimize damage to their plumbing systems.
The Impact of Pipe Clogs and Sludge
Pipe clogs and sludge buildup can significantly impact the functionality of your plumbing system and contribute to leaks. Clogs can occur due to various reasons, including accumulated debris, grease, hair, or foreign objects that obstruct proper water flow. When water cannot pass freely through the pipes, it exerts increased pressure on weak areas, potentially resulting in leaks. Additionally, internal sludge buildup caused by mineral deposits or chemical reactions can corrode pipes over time, further increasing the likelihood of leaks.
It is crucial to address clogs and sludge buildup promptly to prevent long-term damage to your pipes. Regular maintenance practices, such as drain cleaning and using non-corrosive cleaners, can help prevent clogs from forming in the first place. If you notice slow drains or other signs of potential clogs, taking immediate action can save you from more extensive repairs down the line.
Quick Fix Tips for DIY Pipe Repair
Dealing with leaking pipes can be a frustrating experience, but fear not! There are a few quick-fix tips that you can try to address the issue before calling a professional plumber. One common method is using epoxy putty or pipe repair tape to temporarily seal small leaks. These products can provide a temporary fix until a permanent solution can be implemented. Another option is using rubber sleeves or couplings to cover the damaged area and prevent further leakage. These quick fixes can buy you some time while you assess the situation and decide on the best course of action.
However, there may be instances where a quick fix won’t suffice, especially if the damage is significant or threatens the integrity of the entire plumbing system. In such cases, it becomes necessary to consider replacing or repairing the damaged pipe altogether.

Steps to Replace or Repair a Damaged Pipe
When faced with a damaged pipe that requires more than just a temporary fix, there are several steps you can follow to replace or repair it yourself. First, turn off the main water supply to avoid any further water damage. Next, assess the extent of the damage and determine whether it’s appropriate for a DIY repair job or if professional help is needed.
If DIY repair is feasible, gather the necessary tools and materials, such as pipe cutters, replacement pipes (if needed), fittings, and joint compound or adhesive. Carefully remove the damaged section of the pipe using a pipe cutter, ensuring clean and smooth cuts. Then, install the replacement pipe by connecting it with fittings and securing them with joint compound or adhesive according to the manufacturer’s instructions.
Imagine you’ve discovered a burst pipe during a cold winter night, and water is gushing out rapidly. In this situation, it’s crucial to act quickly and follow these steps to minimize the damage and restore your plumbing system as soon as possible.
While DIY pipe repair can be a cost-effective option for minor damages, it’s important to recognize when professional assistance is necessary. Certain situations may require specialized skills and equipment that only experienced plumbers possess. So, don’t hesitate to reach out for professional help if you feel uncertain or overwhelmed by the task at hand.
Measures to Prevent Future Leaks
Preventing future leaks in your plumbing system is crucial to avoiding the hassle and potential damage that can result from water leakage. By taking proactive measures, you can minimize the risk of leaks and ensure the longevity of your pipes. Here are some effective strategies to consider:
Regular maintenance and inspections: Regularly inspecting your plumbing system can help identify potential issues before they become major problems. Check for any signs of leaks, such as damp spots, discoloration, or unusual odors. Additionally, engage in routine maintenance tasks like cleaning drains and flushing out sediment buildup.
Think of it like taking care of your car – regular oil changes and tune-ups help prevent breakdowns and extend the life of your vehicle.
Another important measure to prevent future leaks is ensuring proper installation and insulation:
- Proper installation: When it comes to plumbing fixtures and appliances, ensuring proper installation is essential. Poorly installed pipes or fittings may lead to leaks over time. Therefore, it’s recommended to hire a professional plumber who has the expertise and knowledge to install your plumbing system correctly. This will provide peace of mind, knowing that everything is properly connected.
- Insulation: In cold weather climates, frozen pipes are a common cause of leaks. Insulating exposed pipes in areas susceptible to freezing temperatures can prevent them from bursting and causing water damage. Insulation materials such as foam pipe sleeves or heat cables can help maintain consistent temperatures within the pipes.
Additionally, here are a few more preventive measures:
- Water pressure regulation: High water pressure can put excessive strain on your plumbing system, leading to leaks. Consider installing a pressure regulator or having one professionally installed to control and maintain an optimal water pressure level.
- Proper usage habits: Simple habits like not pouring grease down the drains, avoiding flushing non-biodegradable items, and being mindful of what goes into your drains can help prevent clogs and pipe damage that may result in leaks.
By implementing these preventive measures, you can significantly reduce the likelihood of future leaks in your plumbing system. Remember, taking a proactive approach to plumbing maintenance is key to ensuring the longevity and efficiency of your pipes, as well as minimizing potential water damage in your home.
Final Words
Leak-prone pipes can have various causes, so swift action to address them is critical in order to limit further damage. At Prospector Plumbing & Heating of Fairbanks and surrounding Alaska communities, we understand the urgency associated with plumbing issues; our professional team specializes in diagnosing and repairing leaks quickly and efficiently. If you suspect leaking pipes in your property or have plumbing-related concerns, don’t hesitate to contact Prospector Plumbing & Heating right away for expert diagnostic and repair work. Let them become your go-to service for leak repair solutions today. Schedule your free consultation session now with one of our reliable professionals!

